As your bike is custom built, we cannot provide you a definitive assembly and maintenance guide for your chosen specification. You should consult the manufacturers instructions for each part separately as needed.
Your new bike is fully assembled by us and checked, before some minor disassembly for packaging and transport.
In order to re-assemble your bike you will need:
- 4mm Allen Key
- 5 & 6mm Allen Key if you have Maxle Stealth axles (5R, 6F)
- Shock Pump
- Tyre Pump
We advise you use a 5NM torque wrench to set the torques on the 4mm bolts you’re going to attach.
It is easier to complete the re-assembly in a bike stand if you have one, however if you do not just ask a friend to hold the back end of the bike up for you while you attach the rear mechanism. Thats the only tricky bit.
Step 1 – Check you have what you need.
You will need tools 1, 3 and 4 above as a minimum. You should have received a bike ‘chassis’, and a pair of wheels. You will receive some other parts and paperwork with your bike, but thats not needed right now.
Step 2 – Unpack the bike
Unpack your bike from the box and foam wrapping*, paying close attention to the staples in the lid of the box as you remove the bike from it. They can scratch both you and the bike. Cautious people will remove these before taking the bike out.
*You can leave the handlebars and forks in the wrap to start if you wish, it saves them swinging into each other until you’re ready to assemble them
Step 3 – Attach the rear mech hanger
The rear mech or derailleur as its also known is essential for shifting gears. We set it up before we disassembled the bike for shipping, so all you need to do is attach it.
Locate the two screws that are in the hanger, remove these.
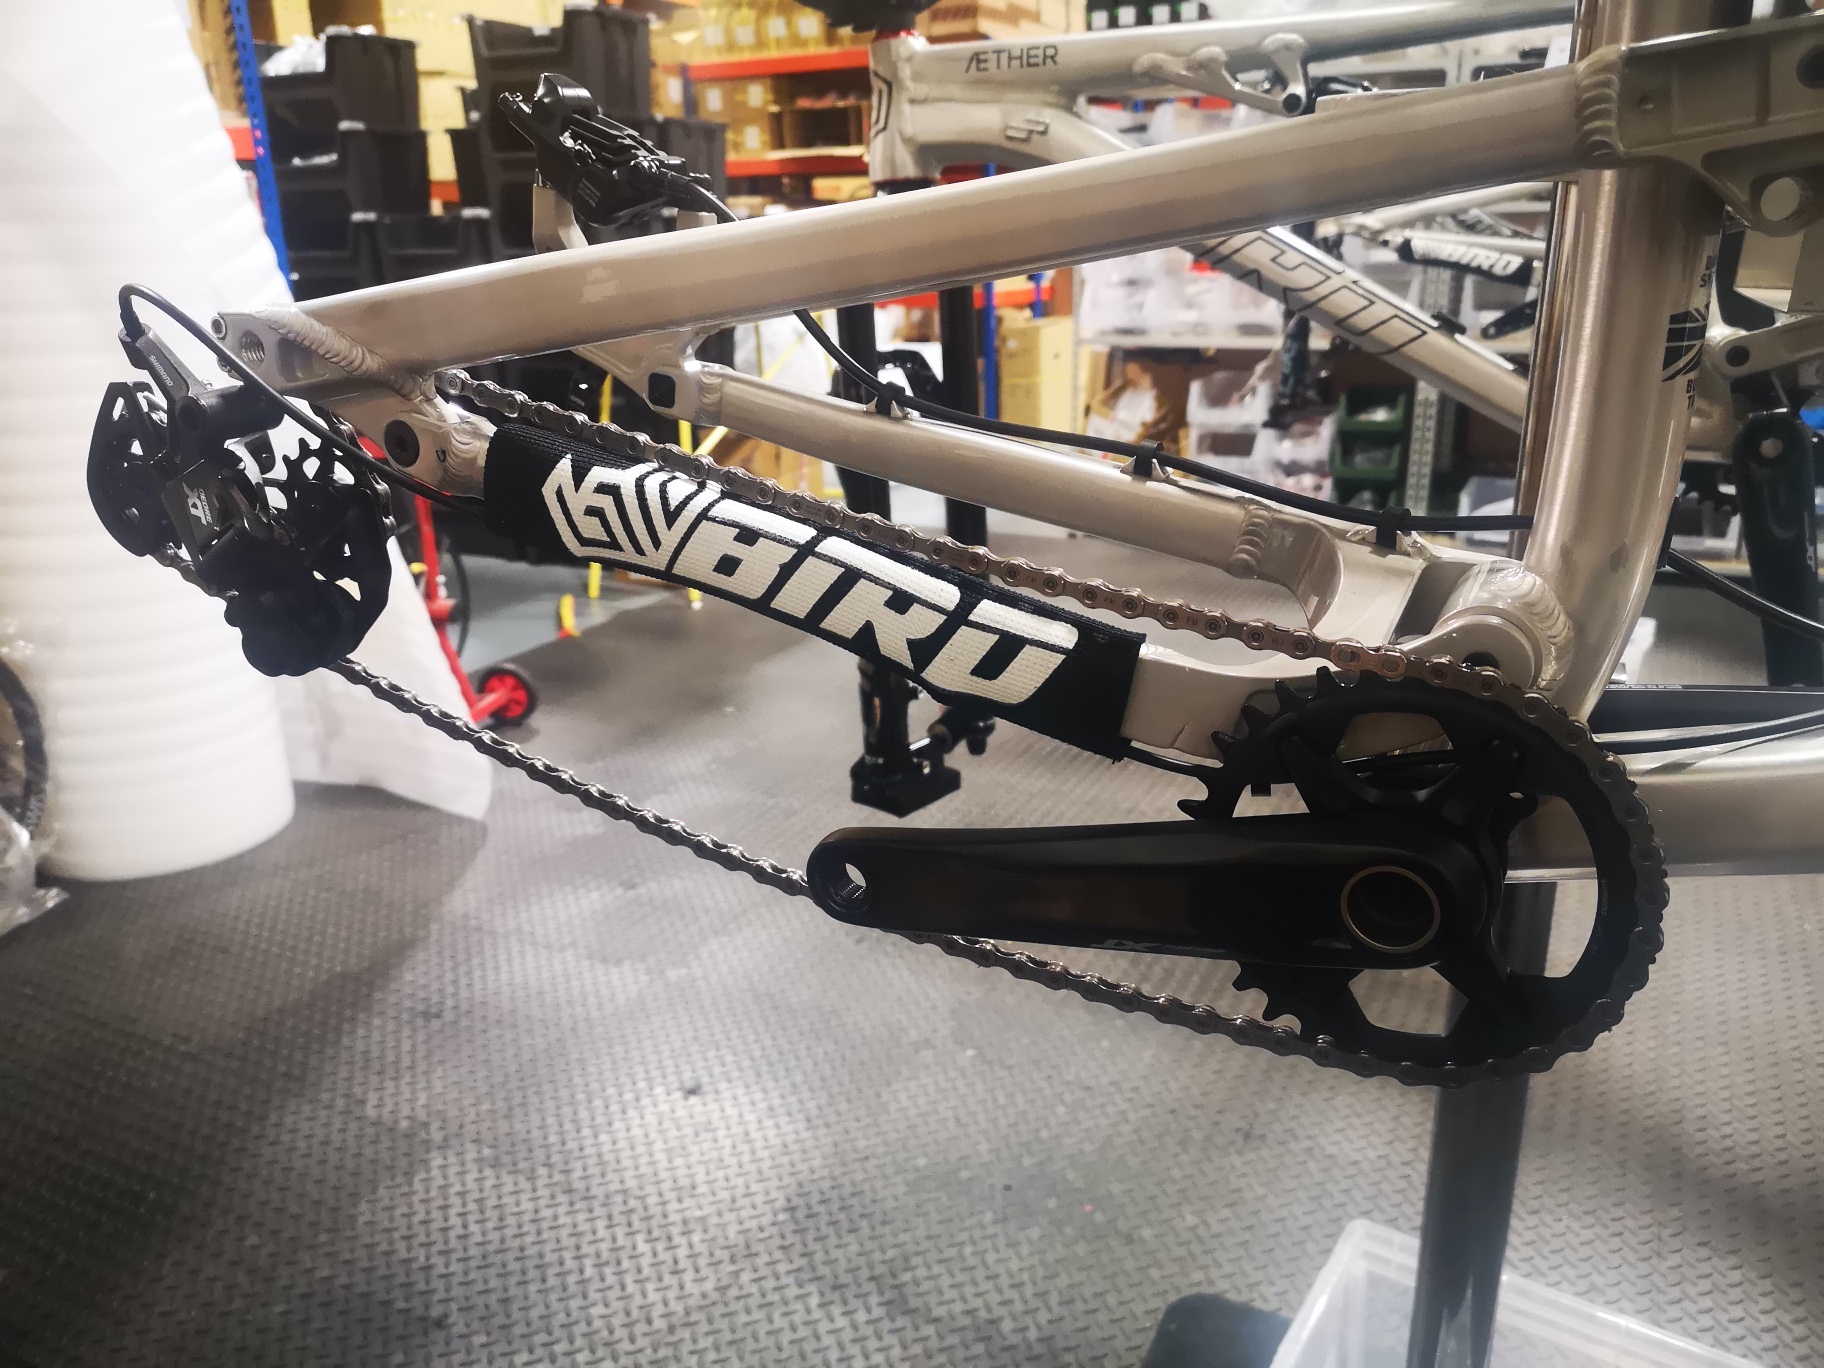
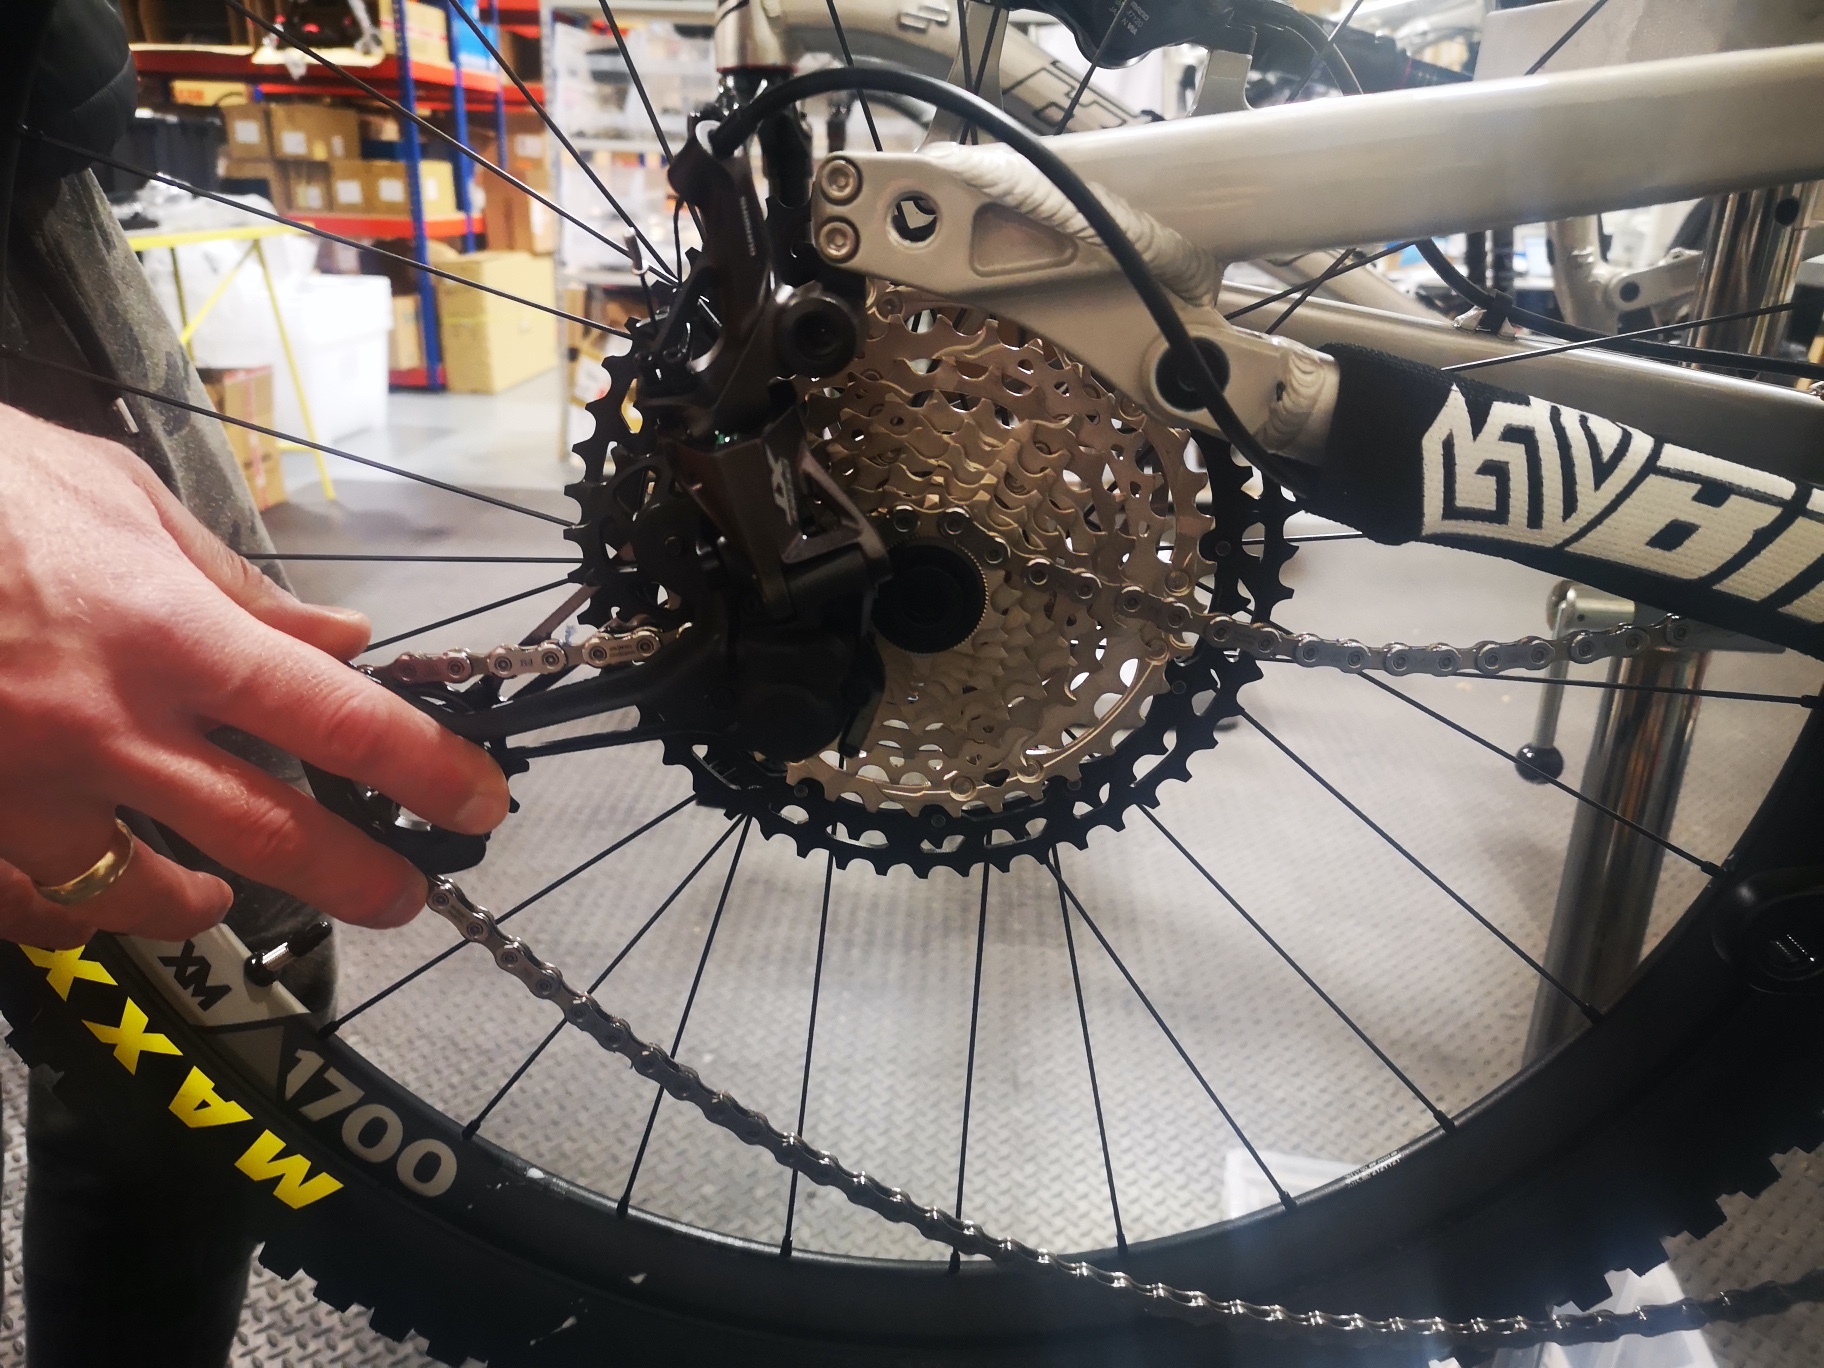
First, we need to sort the chain so its out of the way and doesn’t wrap over itself. Unscrew the rear axle a little and hang the chain over it as is shown below. This will keep the chain in the right place for assembly.
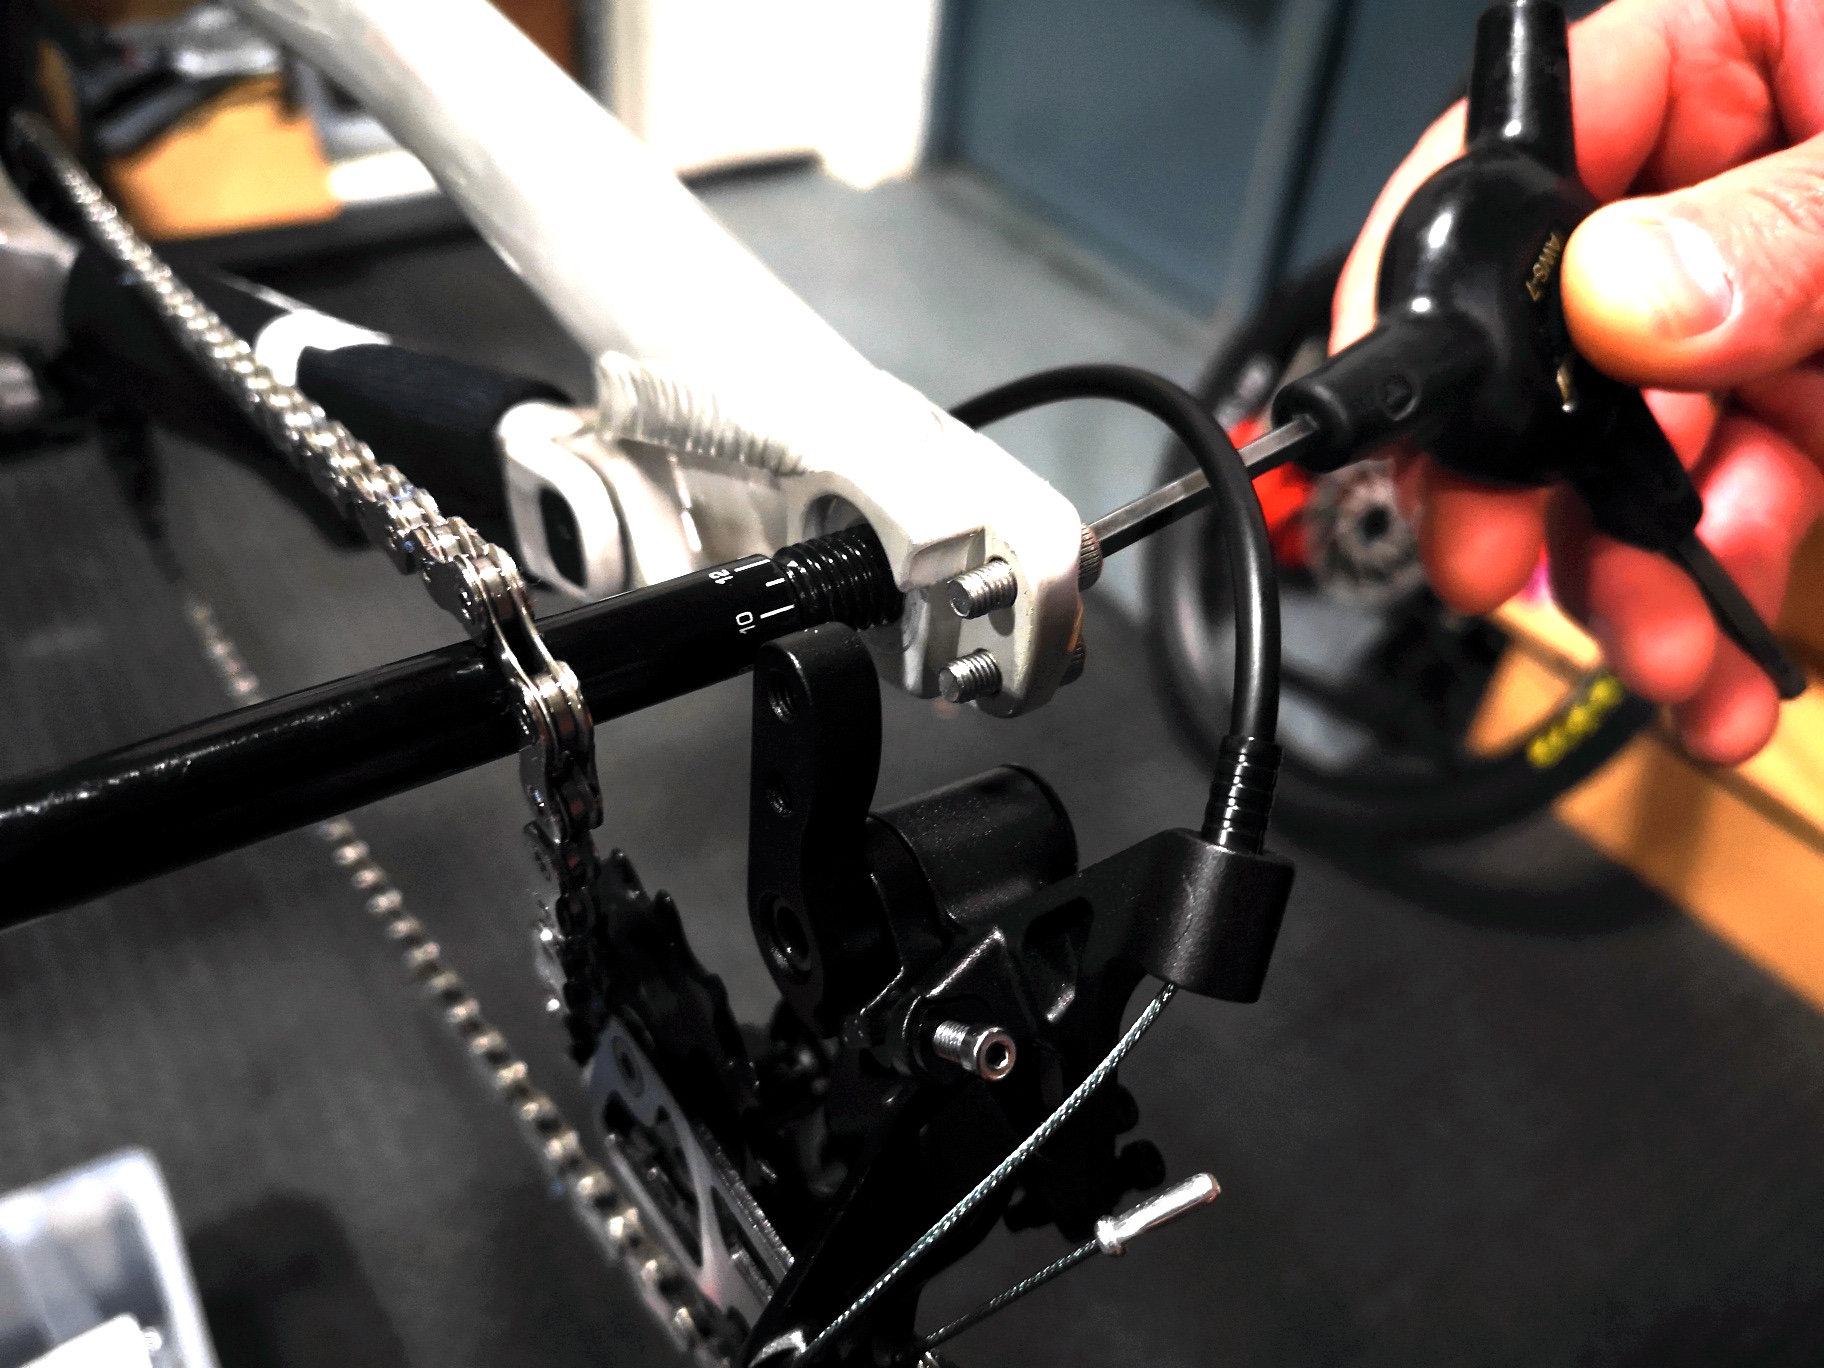
Next, offer up the hanger to the back side of the dropout as shown, and insert the two screws through the holes and thread them into the hanger behind.
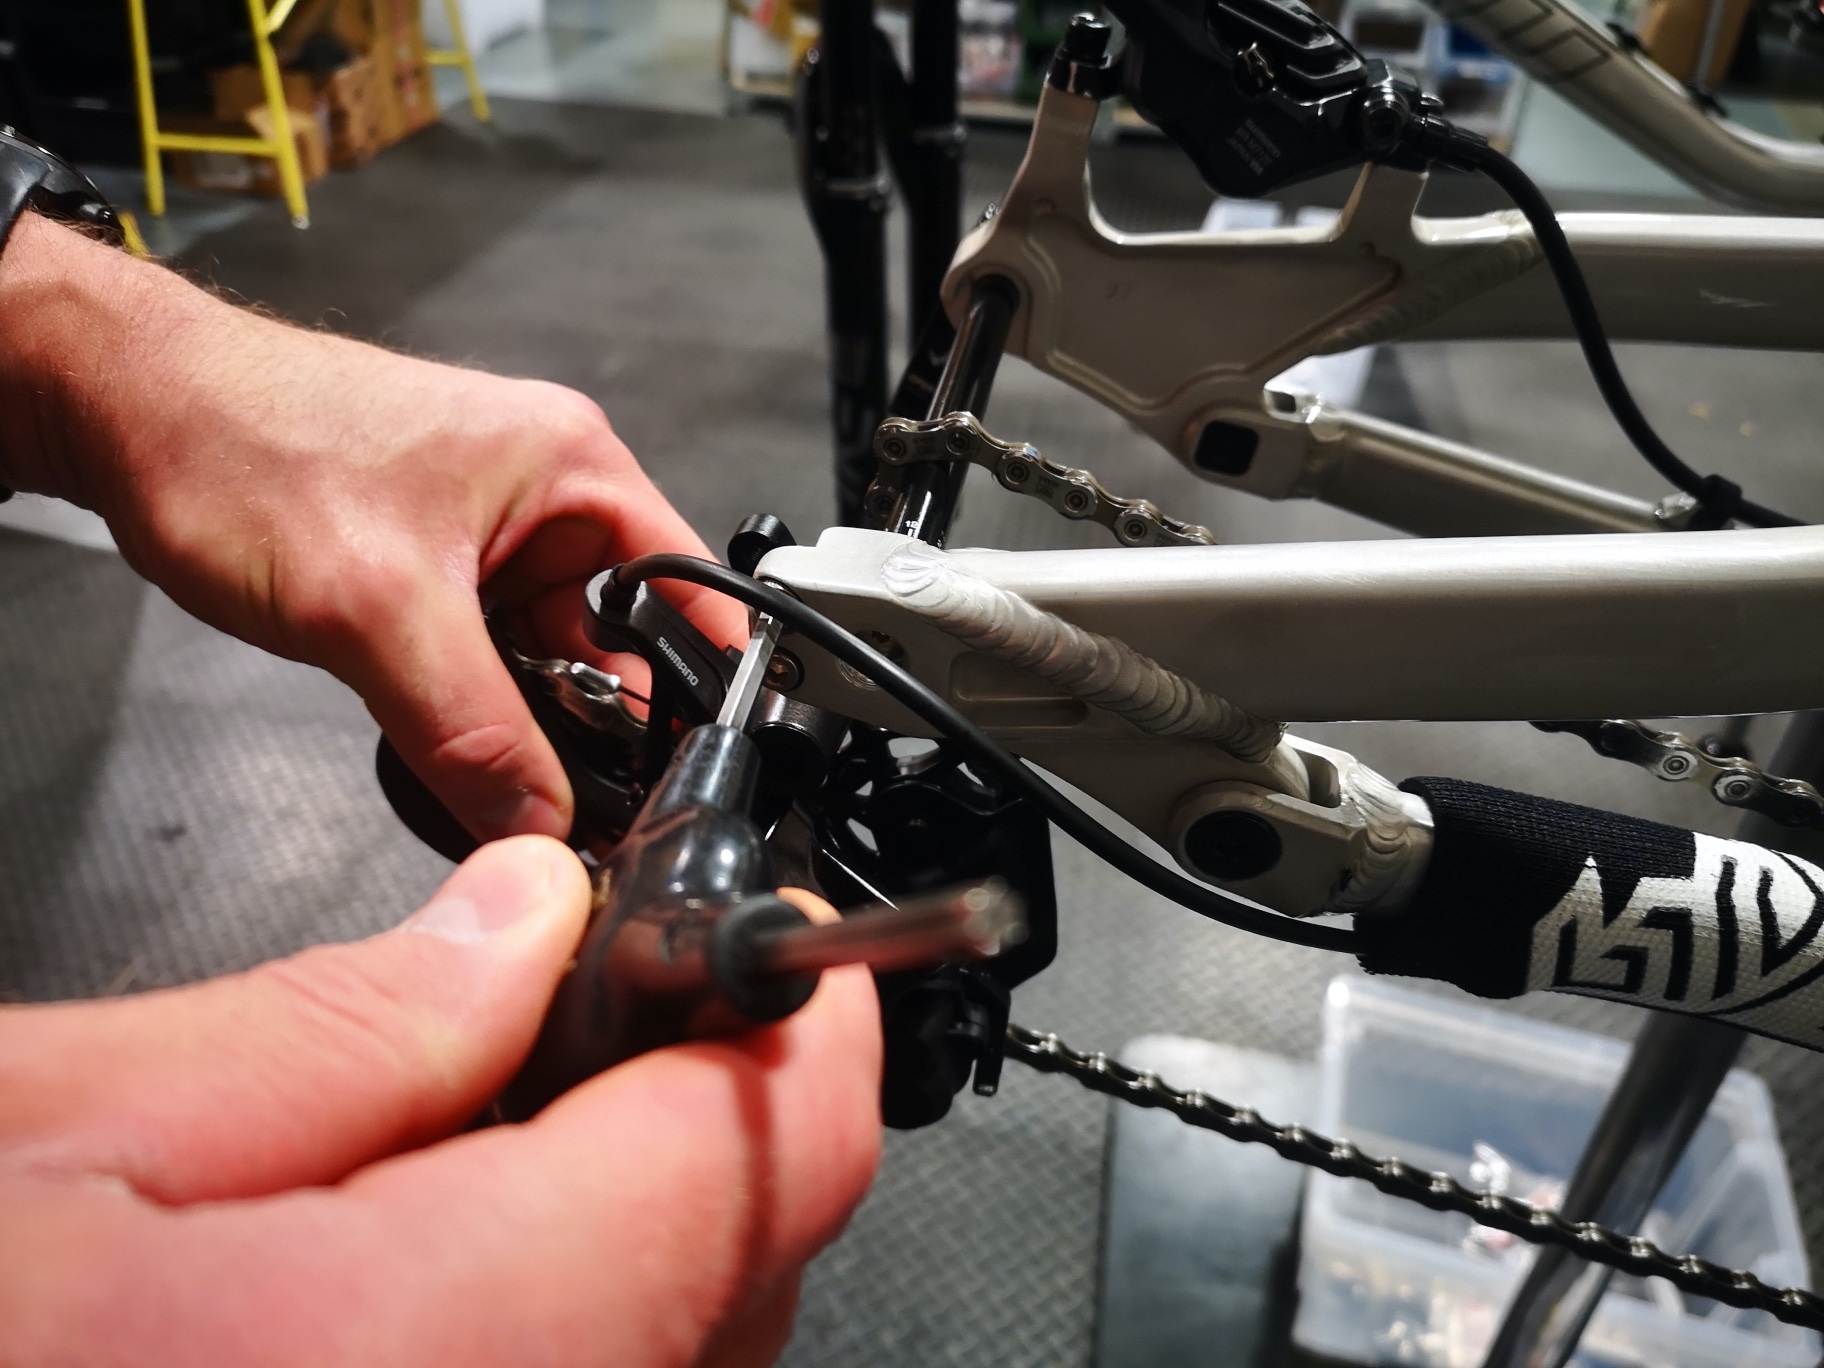
Cinch up the 2 rear mech hanger bolts until hand tight or 5NM.
Step 4 – Attach the bars
The bars attach to the stem using 4 x 4mm allen bolts. These may have locking washers behind each bolt so try not to lose them.
First you need to remove the stem face plate by undoing the 4mm bolts.
Once they’re undone the faceplate will come away. Set this to the side, but not too far away!
Unwrap your bars, and rotate them until the hoses are untangled and look like the image below. You should have gently curving runs for each outer hose to the cable guide or routing hole. You should not have outers and hoses twisting round each other. The alignment marks on your bars should face forward.
Offer up the centre of the bars to the open face of the stem. Attach the stem faceplate over the bars and gently tighten until the bars are held loosely.
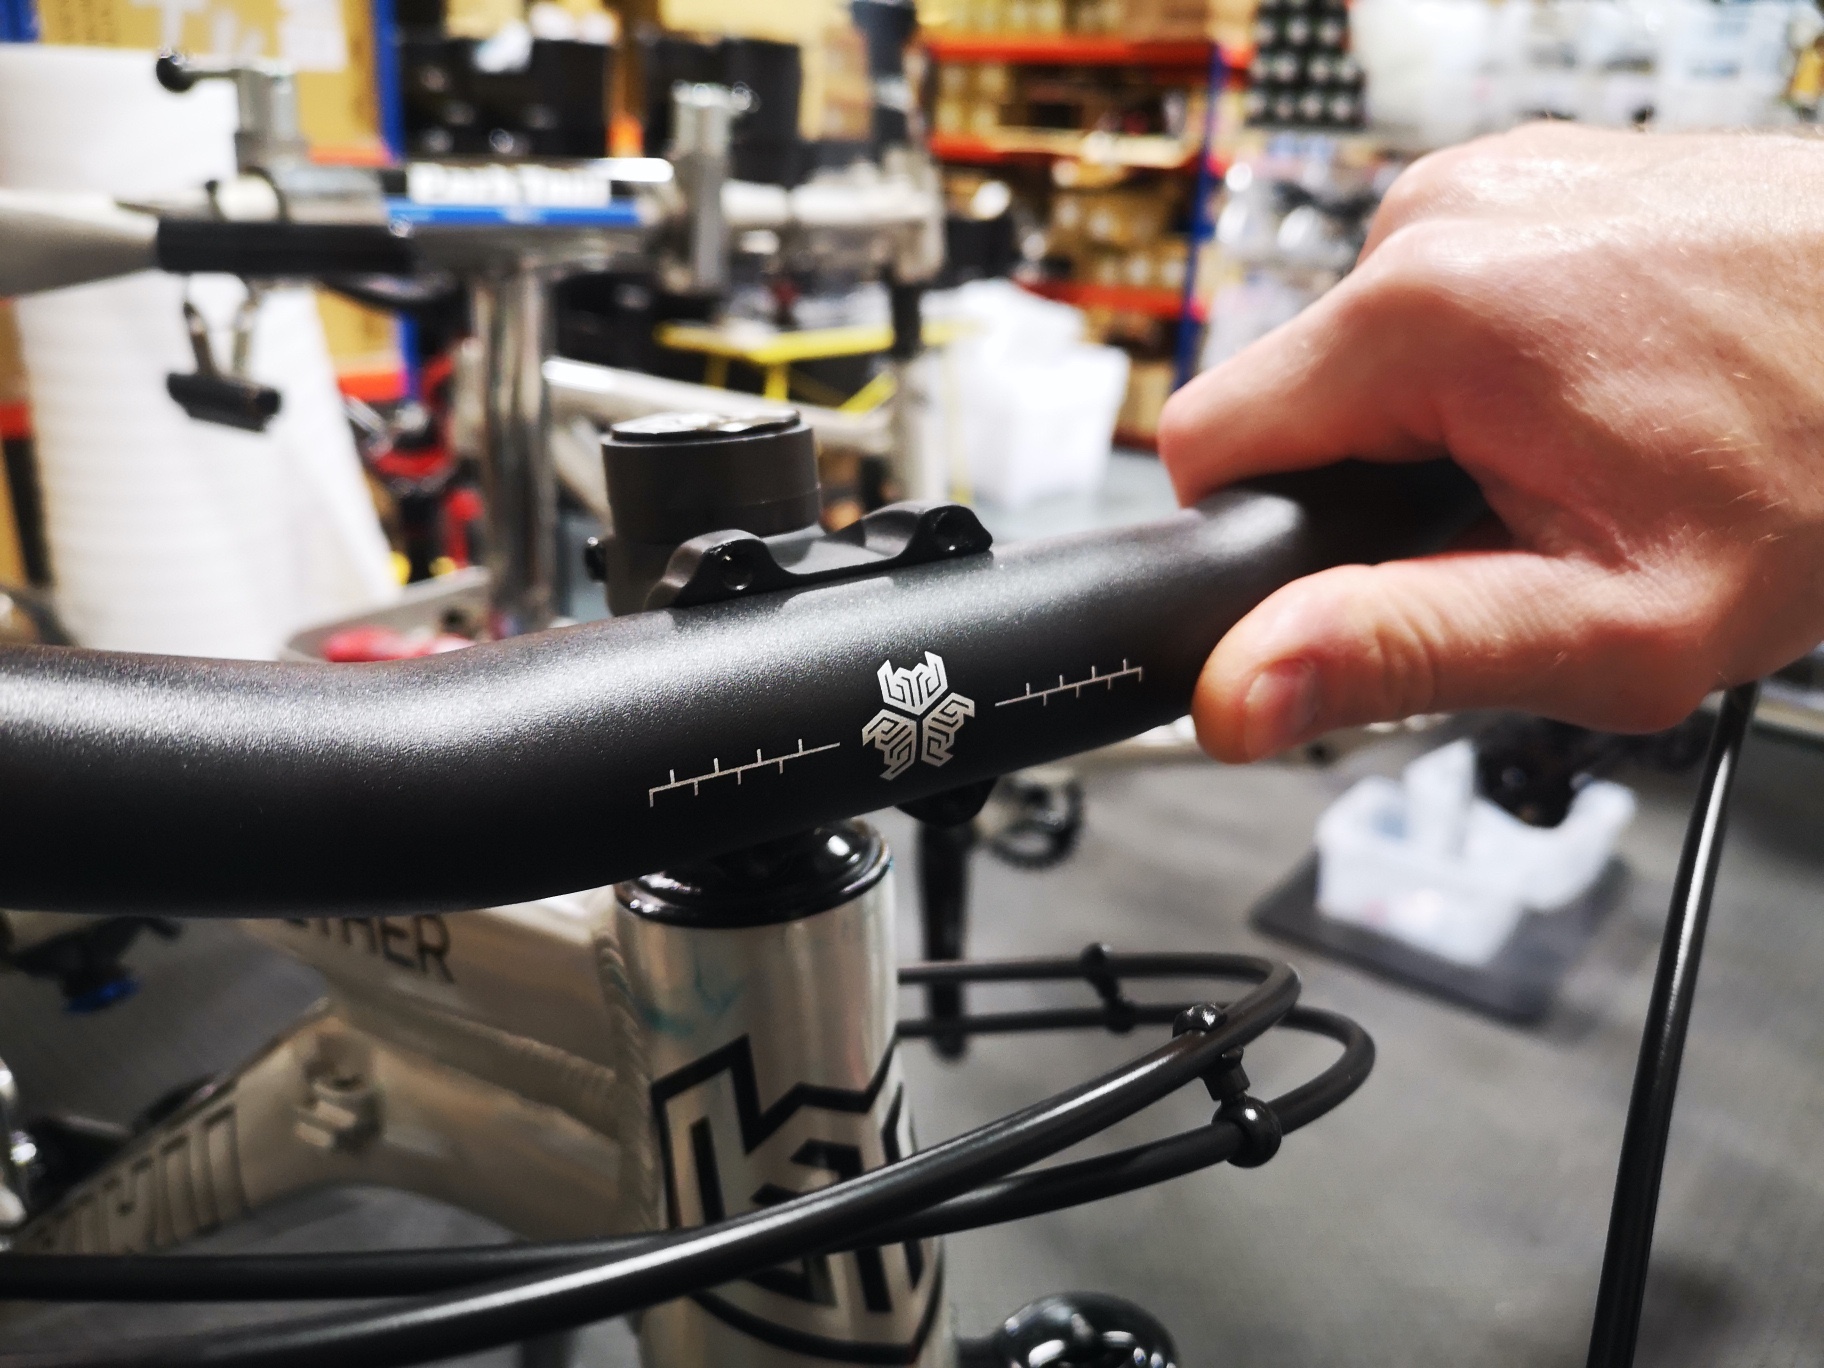
Your handlebars have alignment marks in the middle, something like this:
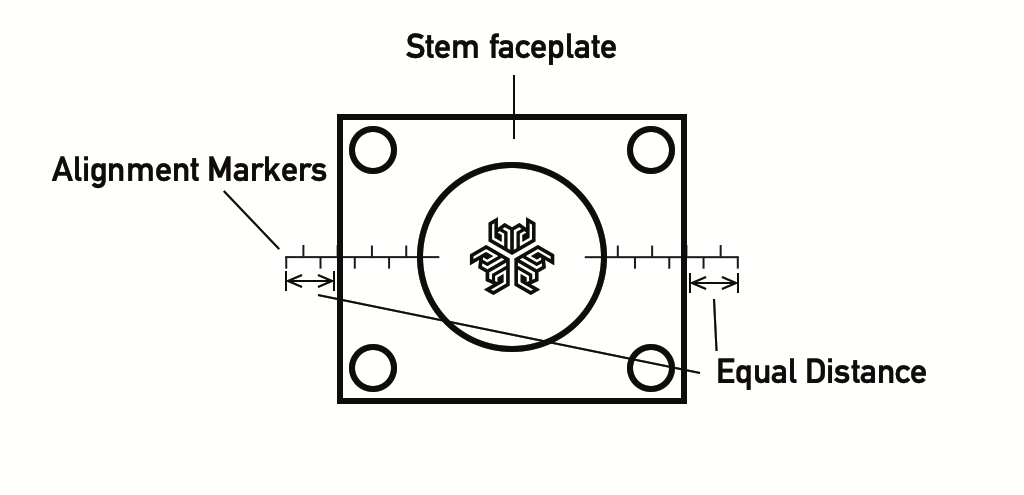
You should align the bars so there is an equal amount of marking showing to either side of the faceplate, and so the alignment marker horizontal centre line is in the middle of the stem, like shown. You can rotate the bars backwards or forwards to suit your personal preference, but we recommend you keep them centred left – right! You may need to loosed the faceplate bolts in order to rotate/move the bars without marking them. Pay extra careful attention when aligning carbon bars, they scratch more easily.
Once you’re happy with the rotation and centre tighten the faceplate bolts. All our stems run a top locking system. This means you should fully close the top two bolts until no gap remains, before then tightening the bottom two bolts. A gap will remain on the lower edge of the faceplate – this is normal and it is not designed to meet up.
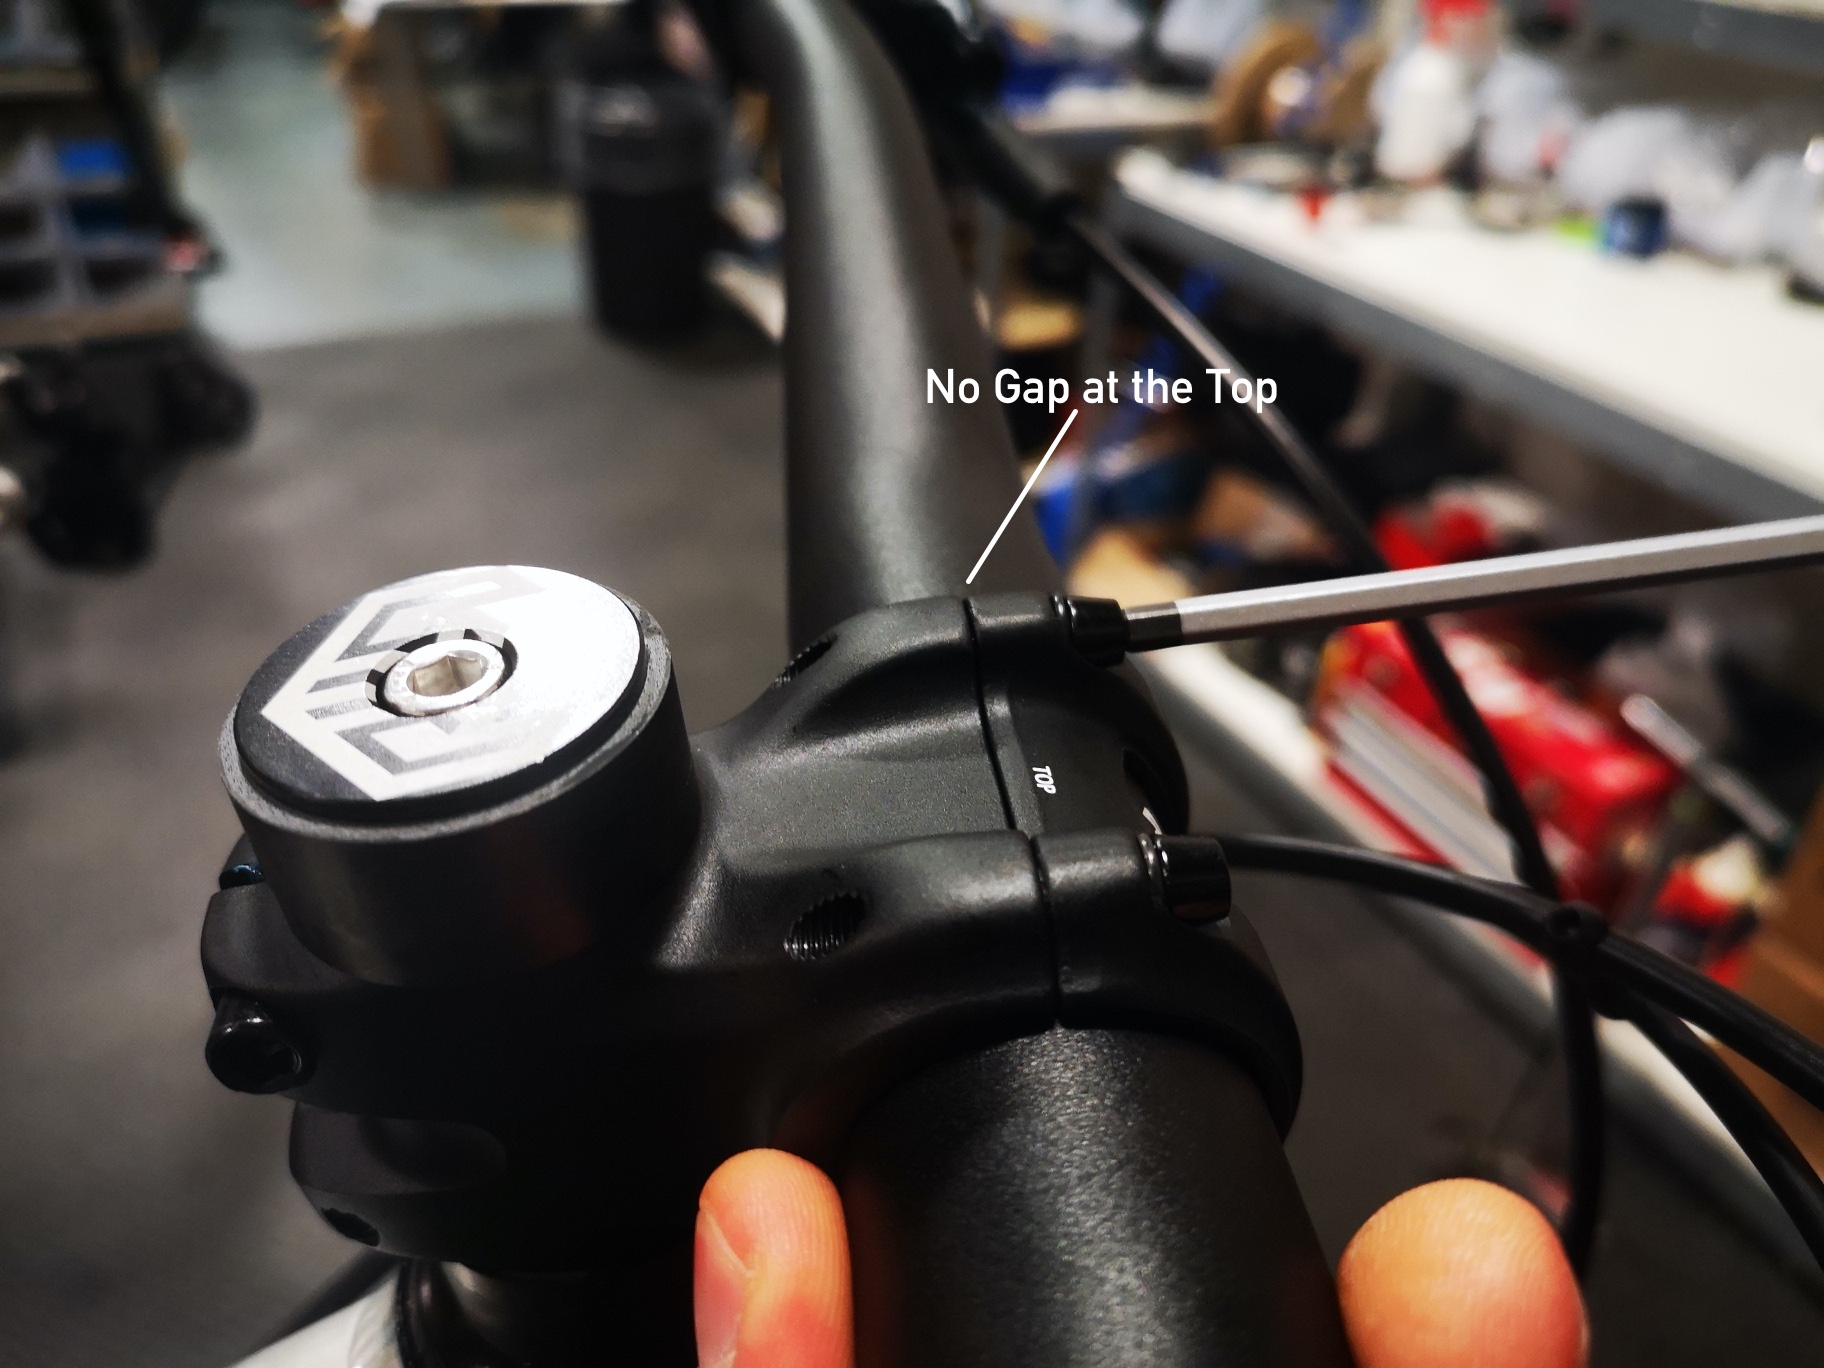
Tighten all the bolts to 5NM. They should be tight but not tightened as hard as you can – this may crush the bar and damage it which could result in an accident. Please read this document for further advice. Please note the marking text varies from stem to stem but you will see an indication of ‘Top’, ‘Under’ or an arrow to indicate faceplate orientation.
Once the bars are attached and you’re happy the bolts are tight enough, test this by attempting to rotate the bars using the grips, if they do not rotate try with more leverage by using the brakes to attempt to rotate the bars. If they rotate you need to reset the bar position and tighten further.
Step 5 – Attach the wheels
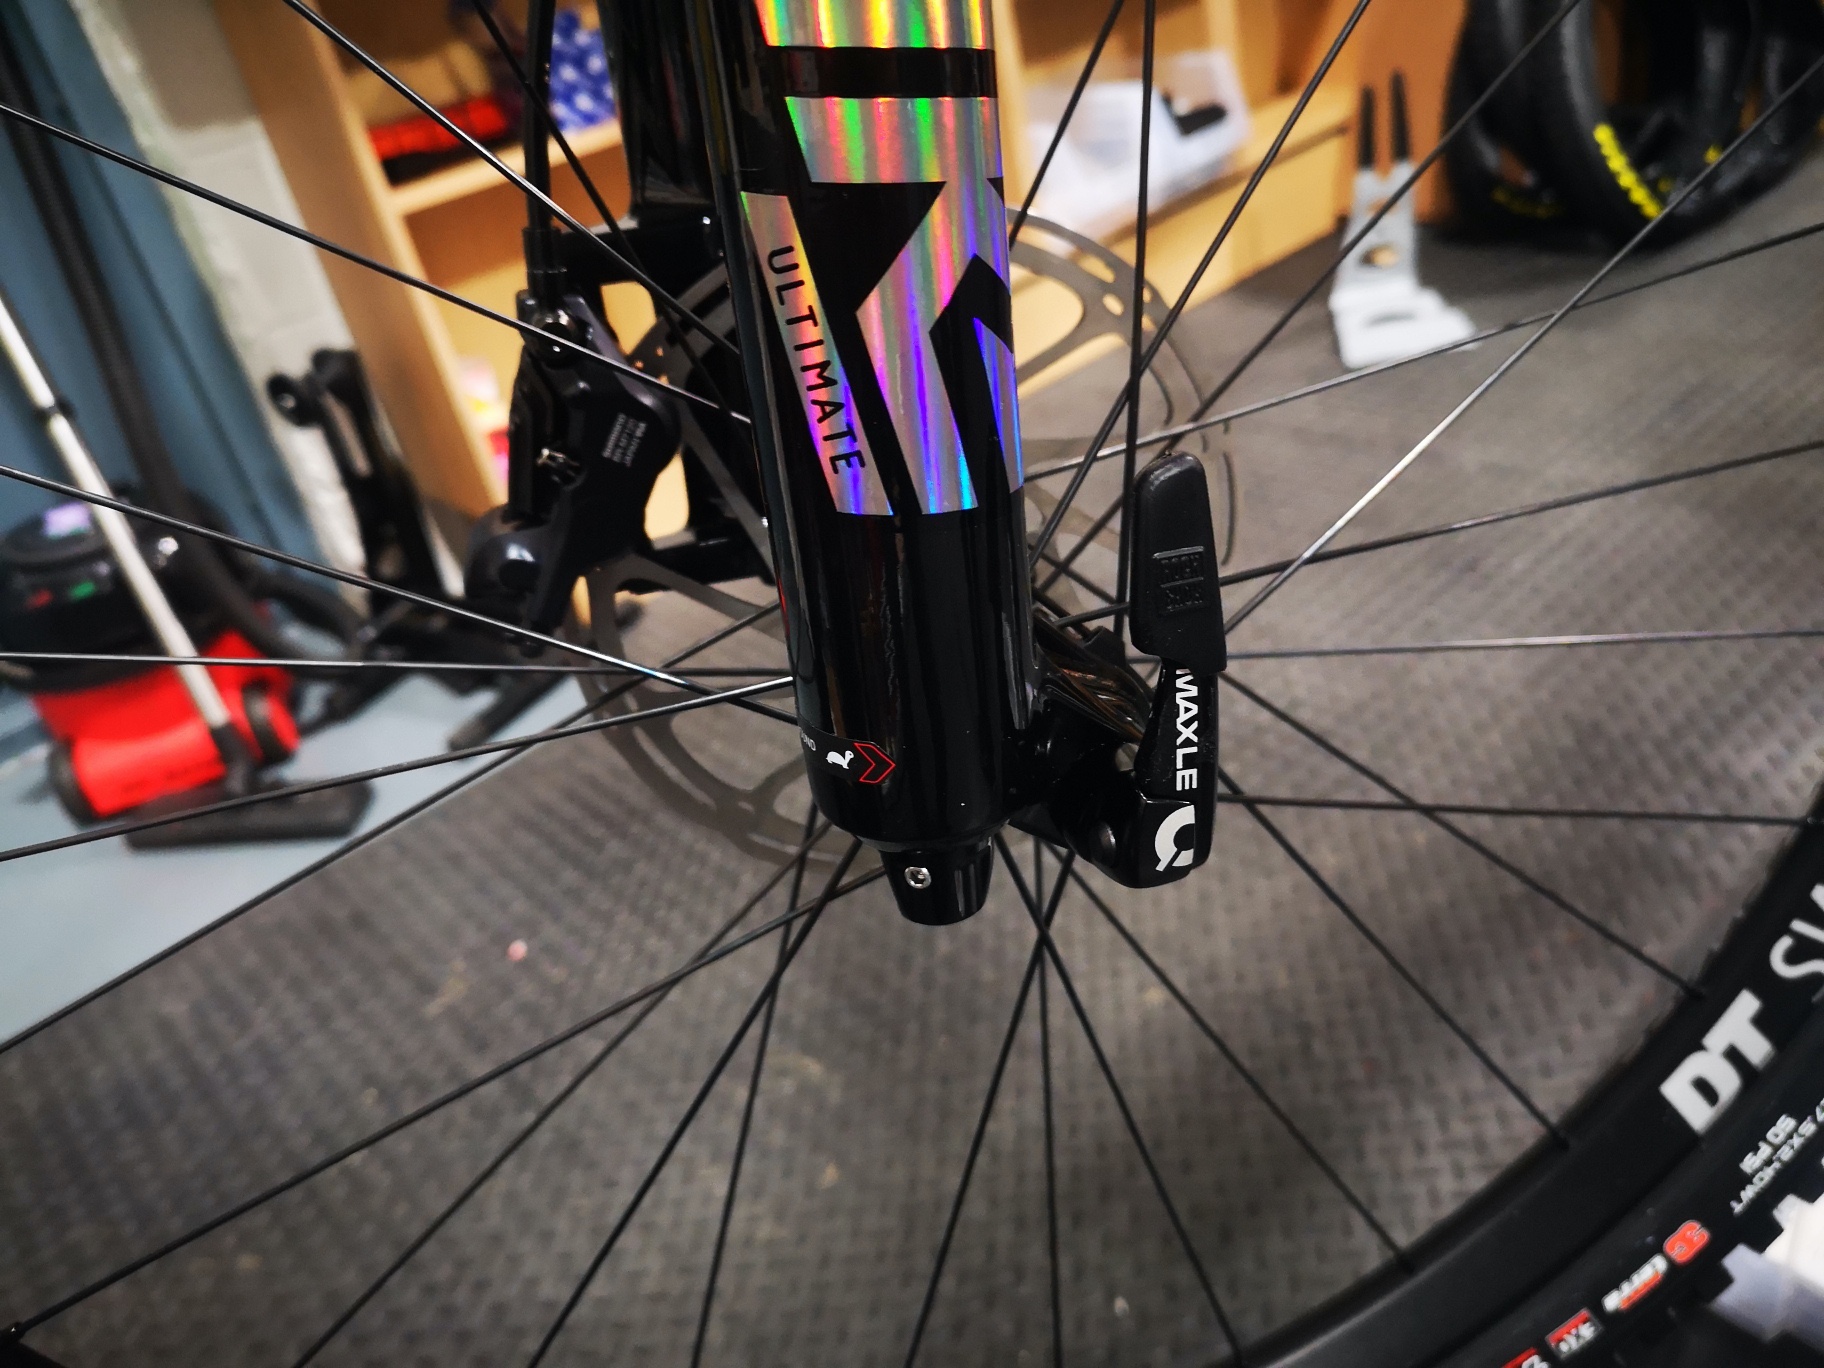
Depending on your axles the instructions vary slightly. Please refer to the manuals for guidance on each axle however set up on each axle will be done for you at the factory. Ensure axles are greased when assembling your bike.
Please be sure to ensure the axles are correctly fitted and tight before each ride.
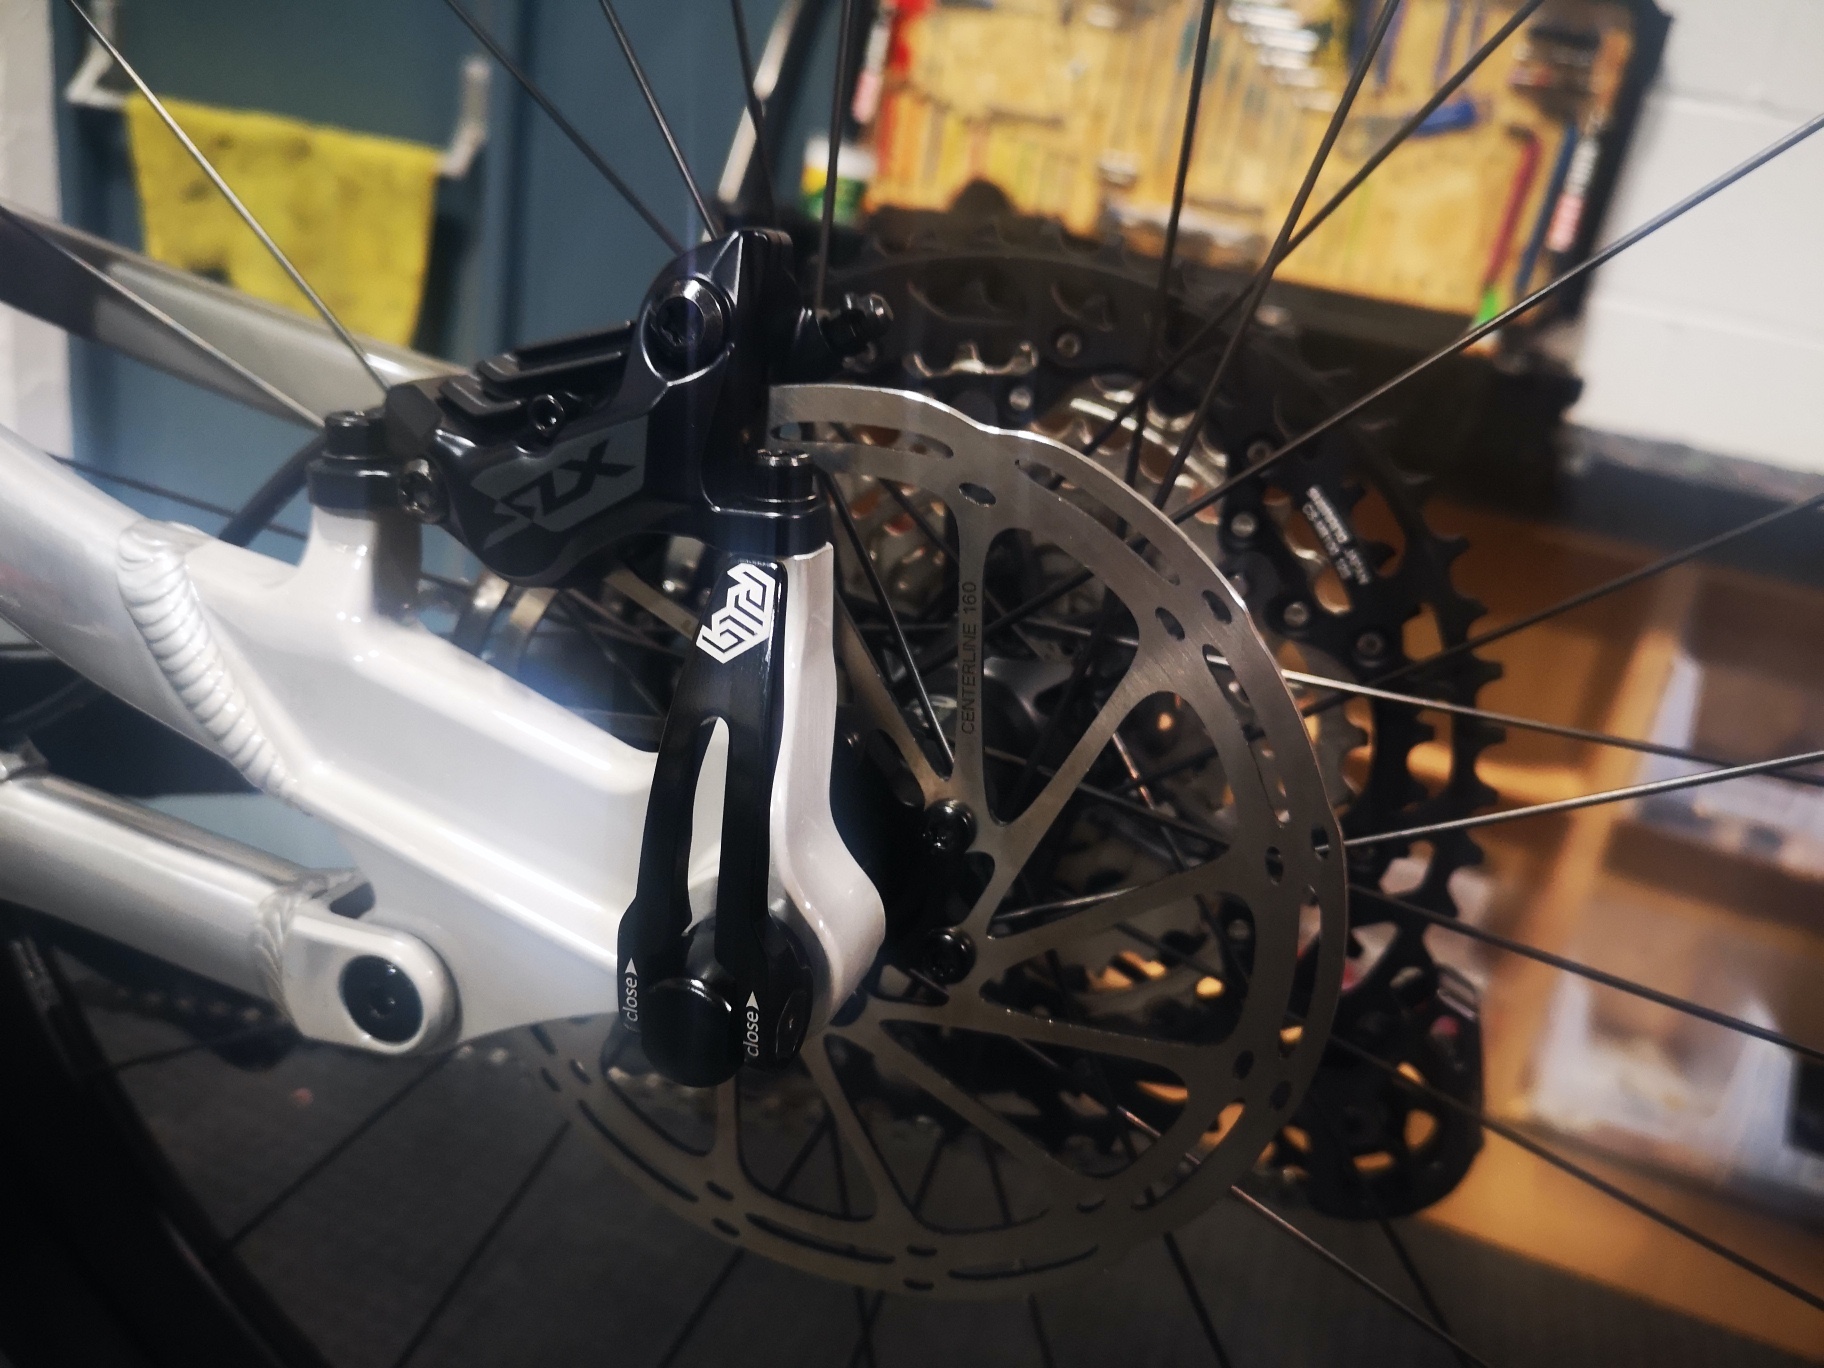
The wheels should be orientated such that the disc brake is on the correct side, and inserts into the brake calliper as shown. The rear wheel will also need to have the chain wrap around the cassette (Cog cluster) in order for drive to work. You should end up with a chain wrap as shown in the image.
In order to make it easy to fit be sure to use the shifter to release the rear derailleur all the way to the outermost position. This is done by pressing the farther forward of the two buttons on your shifter.
For further guidance please consult these manuals (note SRAM and Shimano Manuals are valid for all drivetrains by either manufacturer). Please note the steps in these guides have been done for you. They are provided for reference / education only. You should not need to undertake them.
- SRAM MTB Rear Mech Setup Manual (12-Speed MY2021)
- Shimano MTB Rear Mech Setup Manual (12-speed MY2021)
Once your wheels are in place your axles will tighten in a pre-set position. Outside of this position you’ll find they’re too tight or too loose. See below for positions.
Assembly Complete
Your bike is now assembled, time to set it up.